Appearance
Targets
Everything you shoot in Hyper Bullet is a Target. They burst out of the arena in waves, each one worth 10 base points before your Mods go to work, and your only job is to process as many as you can before the round clock runs out. The catch? No two Targets move the same way — some sit still and beg to be shot, others hop, weave, teleport, or scream across the sky, and one of the bonus Glitches is a flat-out trap.
Quick facts
- In-game term: Targets (the code calls them "enemies" internally — the game's own UI says Targets).
- Default value: 10 points each (
howTo.SCORING_POINTS: "Targets are worth 10 points."), before Red (ADD) and Blue (MULTIPLY) Mods and your Combo.- Toughness: most standard Targets die in one clean hit; some boss-scale Targets take several. (Each Target carries its own hit-point value — the exact numbers are set per-prefab and aren't exposed in the extracted data.)
- Coins: each Target has a chance to drop a Coin when destroyed, and COIN-category Mods raise that chance. (The drop probability is a per-Target value, not exposed in the data.)
- They don't wait: every Target only lives a few seconds before it flees off-screen (a per-Target lifetime, again prefab-set).
- Bonus "Glitches": special fleeing Targets that drop Coins, Hearts, Score, Time, Tokens, Pellets — and one Bomb you must NOT shoot.
- Roster: 31 standard movement types + the Glitch family, drawn from the 39 reference images shipped in the game files.
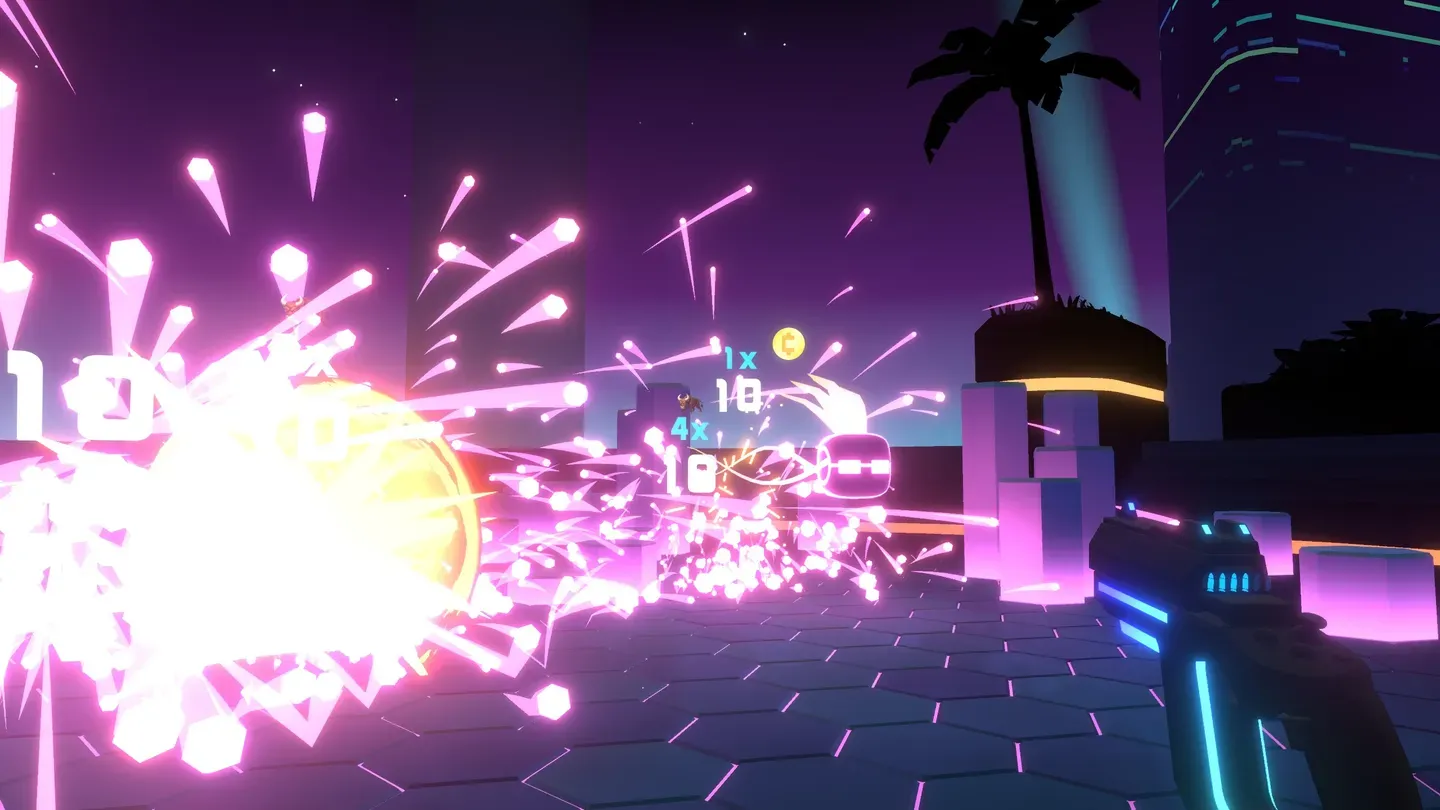 A pistol round detonates a cluster of Targets in the cityscape zone — note the floating
 10 point values, the multiplier popups, and a Coin spinning loose. In-game, Targets are glowing neon 3D shapes like these — not the flat icons shown in the tables below.
New here? Targets are worth 10 points each, Red Mods ADD to that, then Blue Mods MULTIPLY it (starting from a base 1x), then your Combo multiplies again. See Scoring & Combos for the full math, and Tips & Strategy for how to chain it into huge runs.
A note on the artwork. The icons in the tables below are clean reference silhouettes pulled from the game files — handy for telling shapes apart. The real in-game Targets are bright neon 3D objects (see the screenshot above), so treat the silhouettes as a field-guide key, not as in-game captures.
How to read a Target
Before the roster, a few rules that apply to every Target:
- Most die in one hit. Landing the shot is the whole challenge. Tougher waves and bosses scale Targets up in size and toughness, so a boss-scale spawn can take several hits — the per-Target hit-point count is defined on each prefab (the
Enemyclass carries anm_hitPointsfield) rather than being a fixed global number. - Movement is the difficulty. A Target standing still is easy points. A Target that hops, teleports, or flies is "hard" purely because it's hard to hit — Targets don't fight back or damage you.
- Telegraphs are your friend. Many hoppers (Bounder, Monkey, Stampede) shake and squish right before they jump. That wiggle is your cue — fire as it winds up, not after it's airborne.
- Targets leave on a timer. Each Target only lives a few seconds before it flies off ("exiting"). The lifetime is a per-Target value (
Enemy.m_lifeTime), so it varies by type — prioritise the ones about to escape or hardest to re-acquire. - Coins are a bonus, not a guarantee. Destroying a Target has a chance to drop a Coin (the
Enemyclass carries anm_cashValueand anm_cashValueChance); COIN-category Mods push that chance higher. - Augments change the game. Once you pick up Augments like Detonator, Arc Module, or Arctic Pod, one good hit can clear a whole cluster. Aim for the middle of a pack.
Tip: When the screen is crowded, shoot the fast escapers first (Bird, UFO, Runner, Teleporter) and let the slow, predictable Targets (Hanger, Balloon) wait. They'll still be there in two seconds.
Master roster — standard Targets
These are the everyday Targets you'll face on normal waves. Each is worth 10 base points; boss waves can scale them up in size and toughness. The behaviours below are grounded in the EnemyMovement subclasses and movement-state enums in the decompiled code.
| Art | Target | Behavior | How to handle |
|---|---|---|---|
 | Arch | Sweeps in along a smooth parabolic/circular arch toward you, often as a colourful row. | Lead the curve and fire when it crests — a whole arch lined up is a perfect spot for an explosion. |
 | Balloon | Inflates, rises, hovers in the air, then slowly falls while spinning. | The hover phase is a free shot. Pop it while it floats; don't wait for the fall. |
 | Bird | Free-flying flapper that pitches, banks, and dodges obstacles with real flight AI. | One of the trickiest to track. Aim where it's heading, not where it is, and take it early before it loops away. |
 | Bounder | Sits grounded, shakes and squishes as a telegraph, then bounds toward you in big hops. | Shoot it on the ground or mid-wind-up. The squish is your green light. |
 | Cannonball | Fires in low and bounces along the ground, losing force each bounce until it stops. | Track the bounce rhythm and catch it at the top of an arc, or wait for the final low, slow bounce. |
 | Conveyor | Rides a steady "conveyor-belt" path across the edge of the arena. | Totally predictable — pick a spot on its lane and let it walk into your shot. Great for lining up multi-hits. |
 | Dolphin | Leaps in and out of the surface in graceful arcs, like a real dolphin. | Shoot it at the peak of a jump when it hangs for a beat. Ocean zones love these. |
 | Drone | Hovers at altitude and orbits a circle, steady speed, steady height. | Pick a point on its orbit and fire as it passes. Several drones share a ring — line them up. |
 | Fireball | Rolls and jumps while homing toward you, resisting turns. | It's coming to you anyway, so it gets bigger and easier — but don't ignore it. Hit it before it's in your face. |
 | Firework | Rises, then bursts outward into a spray of pieces that scatter and settle. | The burst makes a cloud of easy hits. A single explosion in the middle of the spray clears the lot. |
 | Frog | A leaper that springs in big arcing hops. | Same as Bounder — catch it grounded or at the top of a hop. Don't chase it across the floor. |
 | Hanger | Hangs/perches in place with just a little idle fidget. | The easiest points in the game. Free shot whenever you need to top up your score or combo. |
 | Lava Blob | Rises, falls, then rolls along the ground like a heavy ball of goo. | Predictable once it's rolling. Lead it slightly and fire along its roll path. |
 | Leaper | Spawns clinging to a side wall (SPAWNING), holds for a beat (HOLDING), then leaps at you (LEAPING). | Watch the walls. Tag it while it's stuck before it launches — once airborne it's quick. |
 | Monkey | Hops between treetops, pausing on each perch with a shake/squish telegraph. | Shoot it while it's perched and wiggling. Don't try to snipe it mid-swing. |
 | Rainbow | Arcs across the sky in a wide rainbow semicircle. | Sweep your aim along the arc and fire as it passes the top — a clean, predictable curve. |
 | Rosie | Spins and rolls around a centre point while homing in on you. | Lead its rolling curve. Like the Fireball it closes distance, so it gets easier — just don't let it stack up with others. |
 | Runner | Sprints and hops toward the centre or off to a side, steering around obstacles. | Fast and low. Take it the instant it spawns; it's much harder once it's weaving. |
 | Scurry | A fast scurrying ground Target that darts across the floor. | Snap-shoot early. If you blink it's across the arena. Good target for a wide shot or pierce. |
 | Skimmer | Jumps (JUMPING), winds up (PREPARING), then skims low and fast (SKIMMING) across the surface. | Catch it during the jump or the wind-up — once it's skimming it's a streak. |
 | Skipper | Skips forward in hops with random turns between them. | Unpredictable direction, predictable rhythm. Fire on the hop, not between. |
 | Snake | Slithers in a serpentine, weaving path and jumps as it goes. | Aim at the head and fire when its weave brings it back toward centre. Don't follow every wiggle. |
 | Soldier | Charges straight at you, sometimes jumping, rolling to face you. | A direct, honest charger. Drop it on approach before it crowds your view. |
 | Spiral | Descends in a spiral around a shared centre, often in a formation. | The spiral is regular — pick a height and fire as each one wheels past. A group can be cleared in one explosion. |
 | Split | When hit, splits into smaller copies instead of dying outright. | More targets = more points, but they multiply fast. Clear them with explosions or pierce before they swarm. |
 | Stacker | Builds into towers, each one scaled by its place in the stack, steering as a group. | Knock them down from the top, or hit the base of a stack with an explosion to topple several at once. |
 | Stampede | A herd that bounds forward together — grounded, then bounding, then exiting the arena. | Don't pick them off one by one. Wait for the herd to bunch, then hit the middle — explosions and pierce shine here. |
 | Teleporter | Pauses, then blinks to a new spot on the hex grid. Repeats. | Shoot during the pause — that's your only clean window. Miss it and it's somewhere else. |
 | UFO | Flies a curving start→middle→end path, spinning, then exits. | Fast mover with a set path. Learn the route and intercept at the middle of its run. |
 | Waterfall | Launches up in an arc and rains down across a spread, waterfall-style. | A wide curtain of Targets — perfect for a wide shot, pierce, or a single big explosion in the cascade. |
 | Whirlwind | Orbits tightly while the group patrols left and right as a pack. | Treat the cluster as one. Aim at the patrolling knot and clear several with area damage. |
About the roster art. The game ships 39 reference images under its
enemiesfolder. Thirty-one are tabled above; the Glitch family below accounts for seven more (one base plus six variants). The last image,enemySizePlus, is not a Target type at all — internally it's a size-modifier effect ("Targets are X% bigger"), so it's left out of the roster on purpose.
Tip — group Targets are score gold. Arch, Spiral, Whirlwind, Stampede, Firework, Waterfall and Conveyor all arrive in tight formations. One well-placed explosion (the Detonator Augment), a zap chain (Arc Module), or a pierce shot turns a whole pack into a single huge points pop. This is the core of every big run.
Why some Targets are worth different points. Internally each
Enemycarries its ownm_scoreValue, and a Target can be flagged NORMAL, REWARD, or EXTRA (Enemy.EnemyType). So while the everyday Target is worth the standard 10, special reward/extra spawns can be worth more (or be purely decorative). You'll rarely need to think about this — just keep shooting and the score takes care of itself.
The Glitches — bonus Targets
Every so often a flickering, glitchy Target spawns and starts fleeing across the arena. In-game these are called Glitches (internally enemyGoblin*). Hit one before it escapes and it pays out a bonus — Coins, score, time, even an extra life. They don't stick around, so drop what you're doing and shoot a Glitch the moment you see one.
The base Glitch and its reward variants are listed below. Internally the rewarding variants use a Bonus infix (enemyGoblinBonusCoins/Heart/Pellets/Score/Time/Token); the wiki's art files drop that infix for short names.
| Art | Glitch | What it drops | How to handle |
|---|---|---|---|
 | Glitch (base) | A bonus reward when killed — the classic fleeing Glitch. | Chase it down and tag it before it leaves. Direct hits matter for Glitch-synergy Mods. |
 | Coins Glitch | Coins — straight into your shop budget. | Always worth the shot. More Coins means more Mods, refreshes, and levels between waves. |
 | Heart Glitch | An extra life (a heart). | The rarest and most valuable. Never miss this one — a spare heart can save an entire run. Hunt it first, always. |
 | Score Glitch | A chunk of bonus score. | Free points toward your wave target. Grab it, especially when you're racing the clock to clear a wave. |
 | Time Glitch | Extra round time added to the clock. | A lifesaver on tough waves. Don't let it slip past. |
 | Token Glitch | A Refresh Token (used to reroll the shop; also feeds Trial shops). | Tokens let you reroll the shop for better Mods. Snag it when you're hunting a specific build. |
 | Bomb Glitch | A trap that detonates when you hit it (the EnemyGoblin prefab carries a m_doGoblinBomb flag and a dedicated explosion FX). | Do NOT shoot it. Let it flee off-screen. The exact penalty isn't spelled out in the data, but it's clearly there to punish a reflex shot. |
A seventh reward variant — Pellets. Alongside the six above, the game files include an
enemyGoblinBonusPelletsGlitch (its own object pool). There's no reference image shipped for it, so it can't be tabled with art, but it exists — treat any flickering Glitch as worth chasing unless you've spotted the Bomb.
One of them is a trap. The Bomb Glitch looks like the rest but detonates against you when hit. Learn the difference before you fire on reflex.
Tip — Glitch priority order: Heart > Time (when you're behind) > Coins > Score > Token, and never the Bomb. Build the habit now: glance, identify, then fire. A few greedy reflex shots on a Bomb Glitch will undo a great run.
The shuffle gamble — Monte Targets
Once in a while the arena runs a shell game. A small group of identical Targets — think a row of cups in a three-card-monte hustle — appears, then jumbles and slides around, swapping positions to scramble which is which. One of them is hiding a reward. You pick a Target, shoot it, and claim whatever it was hiding — a classic pick-one gamble.
These are an internal spawn type (EnemyMonte : EnemyMovement) with no player-facing name in the game's text — so there's no official label to quote; treat them simply as a cluster of shuffling Targets when you see one. Under the hood they're a reward spawn, not a scoring Target (the Enemy.EnemyType enum flags spawns as NORMAL, REWARD, or EXTRA), so the point of one isn't the 10 points — it's the prize underneath.
Quick facts
- What it is: a group of identical shuffling Targets — pick one to win its hidden reward. No in-game display name exists (
montereturns 0 hits inloc_en.json); internal id isEnemies/enemyMonte.- How it plays: a batch of
m_countTargets spawn (SpawnGroupMonte : SpawnGroup), shuffle their positions for a beat (m_jumbleTime/m_moveTime, via each Target'sMoveToPosition), then you choose one and shoot it.- The prize: exactly one of three reward types (
MonteReward.RewardType):
- Cash — a payout of Coins.
- Random Mod level-up — a random Mod you own goes up a level.
- Random Hack — a random Hack.
- Pool size: the game keeps a pool of 4 Monte Targets ready (
EnemyMontepoolpoolSize = 4).
How to play the gamble. Unlike everything else on this page, don't snap-shoot. Wait for the shuffle to settle, then commit to one Target. Whatever it's hiding, the others vanish — you get one pick, so make it count.
A gamble, not a score play
A Monte Target won't pad your wave score the way normal Targets do — it pays a reward (Cash, a Mod level-up, or a Hack). Treat it as a free spin: there's no wrong pick that hurts you, only a reward you do or don't grab before the round moves on. How often these spawn is not pinned down in the data — treat them as an occasional bonus, not a reliable resource.
Glitch-synergy items
A whole family of run items is built around Glitches. They split into two groups, and it's worth knowing which is which: shop Mods are upgrades you buy (and can level up) in the Shop, while permanents are one-time pickups you grab on the climb. All names and effect text below are quoted from the game's own data.
Glitch shop Mods (buy and level up)
- Glitch Glut (
goblinSpawn, Tier I, UTILITY) — "{increment} extra Glitches spawn each Wave." Adds +1 Glitch per level. - Whack-a-Glitch (
goblinClone, Tier II, UTILITY) — "When you hit a Glitch directly, {percent}% chance to spawn another. Cannot exceed 100%." The chance grows +20% per level. - Glitchy C4 (
explodingGoblinBoom, UNIQUE) — "Hitting a Glitch explodes the whole arena." A single-level UNIQUE Mod. This is the only Mod that detonates the whole arena, and it only triggers off a Glitch hit — there is no standard Target that wipes the screen.
Also available as one-shot Mods (spawn extra Glitches in your next Wave only): Glitch Gathering ("Spawn 1 extra Glitch in your next Wave."), Glitch Party ("Spawn 2 extra Glitches…"), and Glitch Rave ("Spawn 3 extra Glitches…").
Glitch permanents (one-time run pickups)
These are permanents, not leveled shop Mods — you find them on the Monolith climb, not in the Shop:
- Glitch Injector (
extraGoblins) — "Spawn 1 more Glitch each Wave." - Glitch Hunter (
goblinDouble) — "Glitch rewards are worth double." - Glitchy Timer (
goblinDuration) — "Glitches last twice as long." - Glitchy Reload (
goblinReload) — "Hit a Glitch to reload instantly." - Combo Glitch (
goblinMaxCombo) — "Hitting glitches sets your current combo to the max." - Glitch Guarantee (
criticalGuaranteeGoblin) — "Hits on Glitches have +100% Critical Hit chance." - Frozen Glitch (
goblinDoubleFrozen) — "Hits on frozen Glitches are worth double." (Pairs beautifully with the Arctic Pod Augment.)
Glitch builds: If you keep seeing Glitch items, lean in. Glitch Glut / Injector add more bonus Targets per Wave, Glitch Hunter doubles every drop, and Combo Glitch maxes your Combo on a hit — turning a single Glitch into a scoring explosion. See Mods and Tips & Strategy.
Bosses & the Monolith
A handful of these Targets scale up to boss size at the top of the tower — bigger, tougher, and faster (boss-scale spawns carry higher per-prefab hit-point values, so they take more than one shot). When you reach the final wave, the Monolith itself is the boss — defeat it to complete a run. The boss waves you'll meet are themed around shapes you already know (Arches, Coil, Firework, Spiral, Waterfall, Whirlwind), just turned up to eleven. Everything you learned about reading their movement still applies — there's just more of it.
Read up on the climb, node types, and the final fight on the Monolith page.
Quick strategy recap
- Hit fleeing things first — Glitches, Birds, UFOs, Runners, Teleporters. Slow Targets wait politely.
- Read the wiggle — hoppers telegraph before they jump. Fire on the wind-up.
- Aim at the pack — formations (Arch, Spiral, Whirlwind, Stampede, Waterfall) are where the Detonator, Arc Module, and pierce earn their keep.
- Shoot during the pause — Teleporter and Balloon both give you a clean still moment. Take it.
- Glitches = free value. Coins, score, time, lives. Grab them all… except the Bomb Glitch, which you let escape.
See also
- Scoring & Combos — how 10 base points becomes thousands.
- The Monolith — the run structure, nodes, Augments, and bosses.
- Mods — the full build system, including the Glitch-synergy Mods above.
- Tools — Pistol, SMG, and Shotgun.
- Tips & Strategy — builds, Augments, and how to chain it all together.